Deploying Node.js applications to AWS Elastic Container Service (ECS) - Part 2
Elastic Container Service or ECS is AWS’s container orchestration service.
If you haven’t heard about ECS, please click on the link above to learn more, or read a brief summary of the topic in Part 1 of this post series.
1. What are we deploying?
In this post, we’ll deploy a very simple Express server to AWS ECS.
We will create a Dockerfile from which the image will be built, and we’ll push this image to Amazon Elastic Container Registry (ECR).
Once the image is uploaded, we’ll launch the application by creating a Task Definition, a cluster and a service, and will check if the app is working. We’ll use EC2 launch type, which allow more control on the underlying instance.
We’ll use the AWS Console to do the necessary tasks.
1.1. Pre-requisites
If the reader wishes to follow this tutorial, they need to have Docker, Node.js and AWS CLI installed and have an AWS account (12 months free trial is available).
You will also need an access key and a secret access key to use AWS CLI in the region where you want the app to be deployed (in this post, it’s us-west-2, but it could be any other region). If you want to follow the steps outlined below, please don’t read on until the keys are created and saved into the ~/.aws/credentials folder. This page explains how to create the access key and the access secret key.
1.2. Install the dependencies
Create a project folder, and run npm init -y from the terminal.
There’s only one dependency in this project, Express.js, so let’s install it quickly by running npm i express.
1.3. The server
In the project folder, create a file called index.js, and paste the following code:
// index.js

const express = require('express')

const app = express()
const PORT = 3000

app.get('/', (req, res, next) => {
  res.status(200).send({ message: 'Home page' })
})

app.get('/orders', (req, res, next) => {
  res.status(200).send({
    orders: [
      'apple', 'banana', 'lemon'
    ]
  })
})

app.use((err, req, res, next) => {
  res.status(400).send({ message: err.message })
})

app.listen(PORT, () => {
  console.log(`Server is running on port ${ PORT }`)
})
There’s nothing fancy here, this is a very basic Express server, which returns an object with a message property having a value of Home page when the base URL (/) is hit.
We can define another endpoint and call it /orders (pretend this to eventually become an app that has something to do with orders), and the response will send the status code of 200 and an array of healthy fruits. What else could we ask for?
1.4. Dockerfile
The server will run inside a Docker container, so we’ll need to build an image.
We can do that by creating a file called Dockerfile in the same folder as index.js is located, and it can look like this:
# Dockerfile

FROM node:10

WORKDIR /usr/src
COPY package.json .

RUN npm install --production

COPY index.js .

EXPOSE 3000

CMD node index.js
Again, it’s very simple. We use version 10 of Node.js, then we create a working directory inside the container (/usr/src) and copy both package.json and index.js to the newly created working directory.
In between, we install the dependencies, expose port 3000, and finally, we start the server by running the node index.js command.
1.5. Build the image
Now that the Dockerfile has been created, we can build the image, which will be uploaded to the registry.
We can do this by running the following command:
docker build -t ecs-alb-tutorial .
We tag the image as ecs-alb-tutorial and use the Dockerfile located in the same folder (the .).
alb refers to Application Load Balancer on AWS, which is not part of this post. It may be covered in a future post though.
1.6. Check if it works
You can now check if the code works by running a container off the image:
docker run --rm -p 80:3000 ecs-alb-tutorial:latest
The container will be removed from the computer after it has been stopped (--rm flag), and we open port 80 on the host machine. This means that the app won’t be available on port 3000 as it was if we didn’t use containers but on the default HTTP port.
If everything goes well, the Server is running on port 3000 message should appear in the terminal (this refers to the port on the container now).
We can now go to the browser and type localhost (or 192.168.99.100 on Windows). The response should contain the object with the Home page value. If we hit the /orders endpoint, the array of fruits should wave back to us.
Alternatively, we can use curl to check the response from the terminal (curl http://localhost/orders), and we don’t have to bother with the browser.
2. Create the repository and upload the image
It’s time to move on to AWS.
2.1. Create the repo
Sign in, and go to ECR by typing it in the search box. Once at ECR, click on Create repository, and add a descriptive name like ecs-alb-tutorial, and press Create. The repository should be created.
2.2. Upload the image
We can now upload the image we created in step 1.5 to ECR.
To do this, we’ll need to authenticate our local Docker client with ECR, and then we’ll log in to the repository, and will upload the image.
It’s assumed that AWS CLI is configured to the selected region, which can be easily done in the terminal by following the steps outlined on this page.
If you check the repository in ECR, the View push commands button will be enabled. All we need to do is to follow these steps.
First, let’s fetch the registry login info from AWS:
aws ecr get-login --no-include-email --region us-west-2
This command should return another command which starts with docker login. The -u AWS is the username, the extremely long series of characters after -p is the password to ECR, and the last bit of the return value is the server, which has the https://<YOUR_ACCOUNT_ID>.dkr.ecr.<REGION>.amazonaws.com form.
Next, copy this command, and run it from the terminal. By doing this, we’ll log in to the newly created repository on AWS. If everything goes well, the Login Succeeded message will show in the terminal (and a warning about --password being insecure, but don’t worry about it for now).
Now that we are logged in, we can tag the image for upload:
docker tag ecs-alb-tutorial:latest <YOUR_ACOUNT_ID>.dkr.ecr.<REGION>.amazonaws.com/ecs-alb-tutorial:latest
The last step is to upload the image to ECR:
docker push <YOUR_ACCOUNT_ID>.dkr.ecr.<REGION>.amazonaws.com/ecs-alb-tutorial:latest
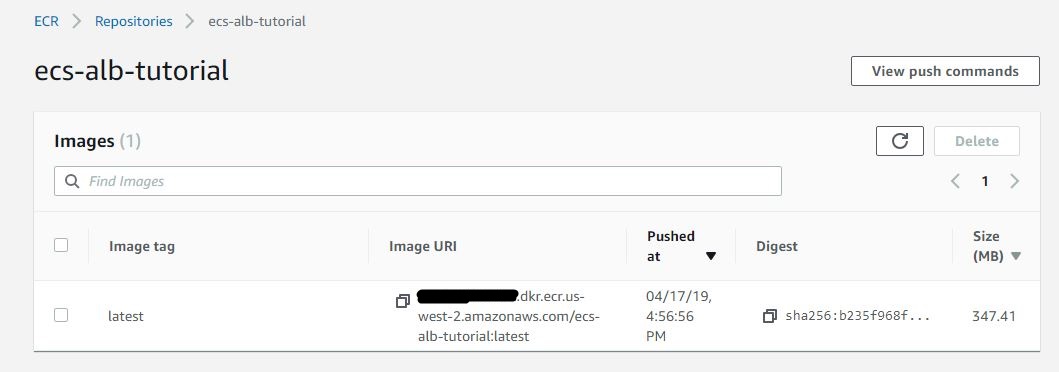
When the image arrives in ECR, it’ll display it inside the repository:
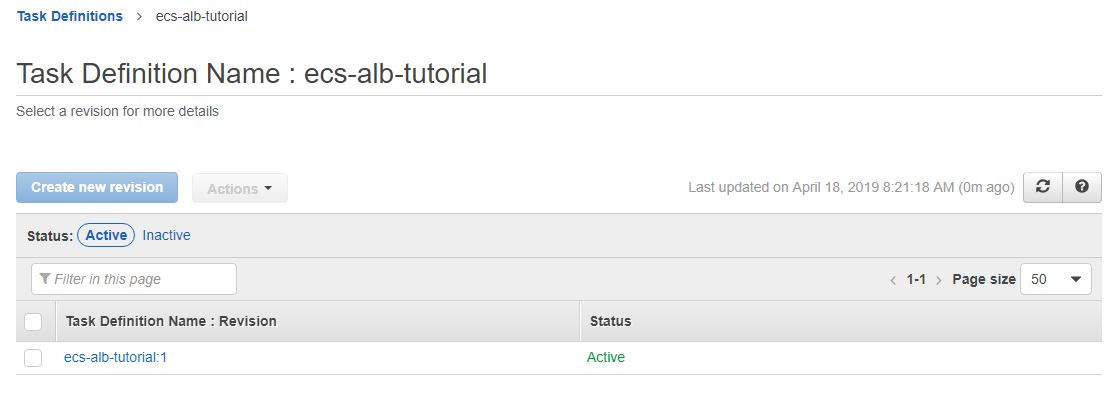
3. Create a Task Definition
Let’s now create a Task Definition.
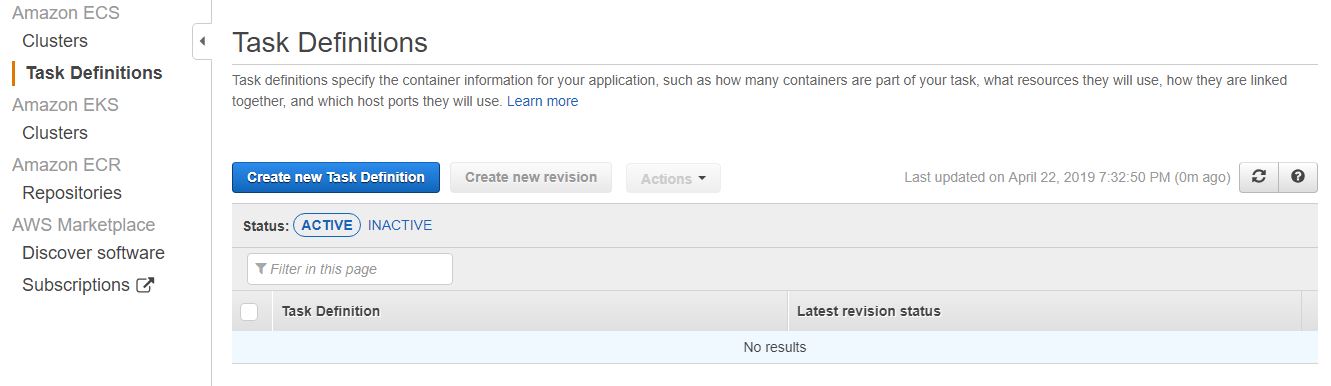
Task Definitions define what we want to deploy. Go to ECS in the AWS Console, and select Task definitions from the menu on the left. Press Create new Task Definition, and select EC2.
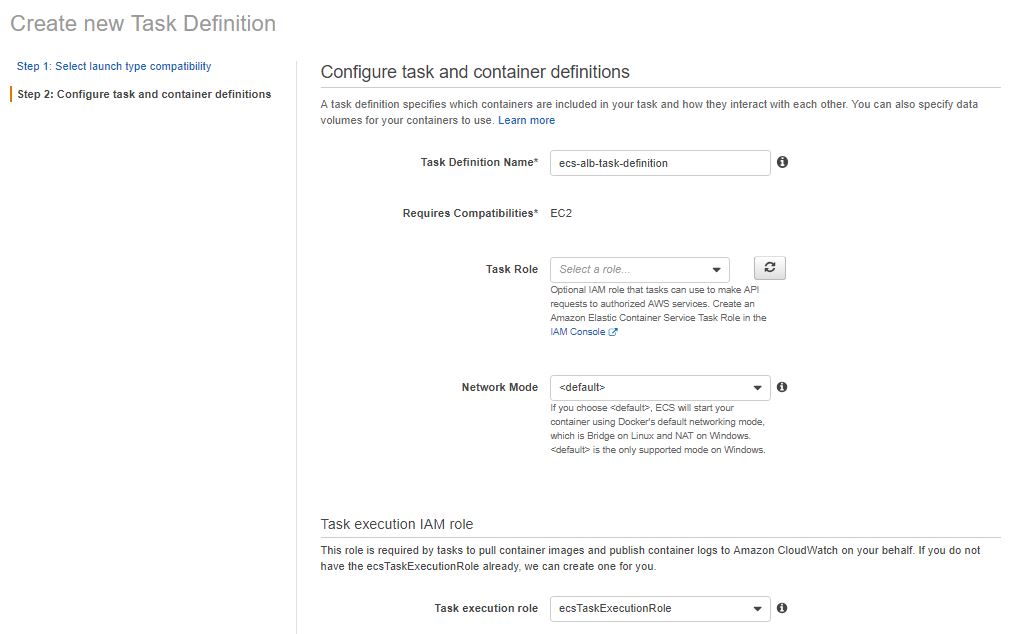
On the next page, add a name to the Task Definition, and you can leave the default for the network mode.
The Task Role section is for the containers. If the containers connect to other AWS services like RDS or DynamoDB, tasks will need permission to make API calls (get elements, insert or update rows etc.) on behalf of us. This simple Node server is not connected to any other AWS services, so we can leave it as is.
The Task Execution IAM Role is necessary for ECS to pull the image, start the containers and send logs to CloudWatch. AWS will create this role (called ecsTaskExecutionRole), so select Create new role if you don’t have it.
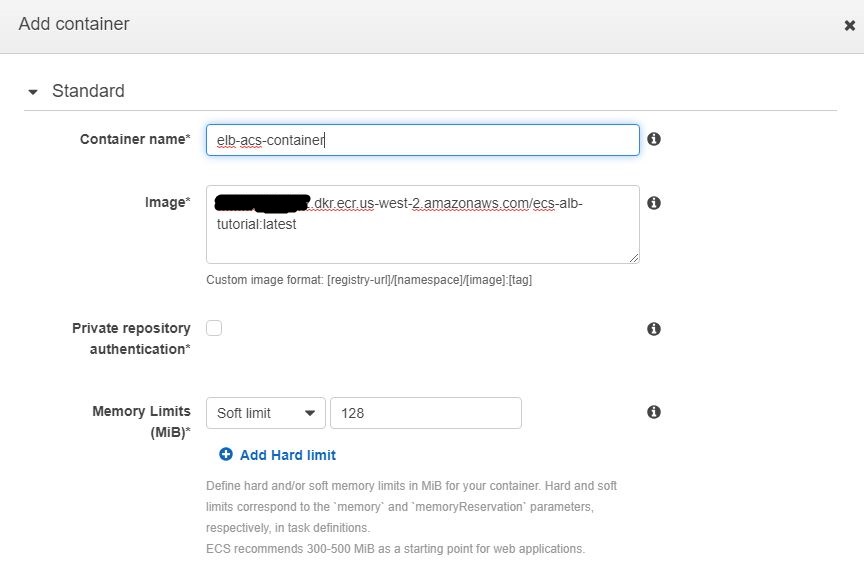
Next comes the fun part: defining the containers. Under Container Definitions, click on Add Container.
Give a name to the container, and refer to the image in ECR by copying the URL of the image, and add a soft limit of 128MB Memory Limits.
In the Port Mappings section, enter 80 for the host and 3000 for the container.
In the rest of the section, you can define any environment variables, links to other containers, container names if other containers are connected to the network and many more options. None of these apply here, so we can leave the rest of the fields as they are, and click on Add.
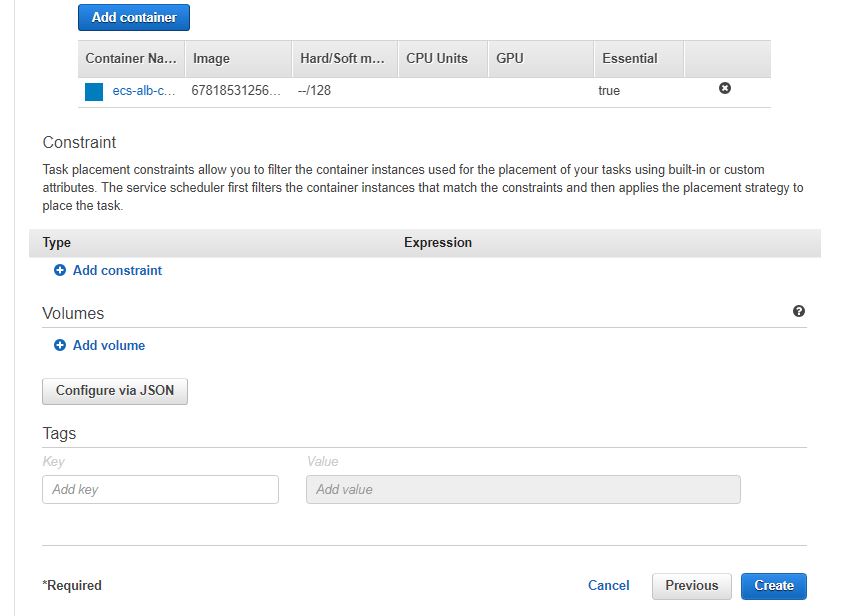
The container is added, so click on Create. The Task Definition page should look like this:
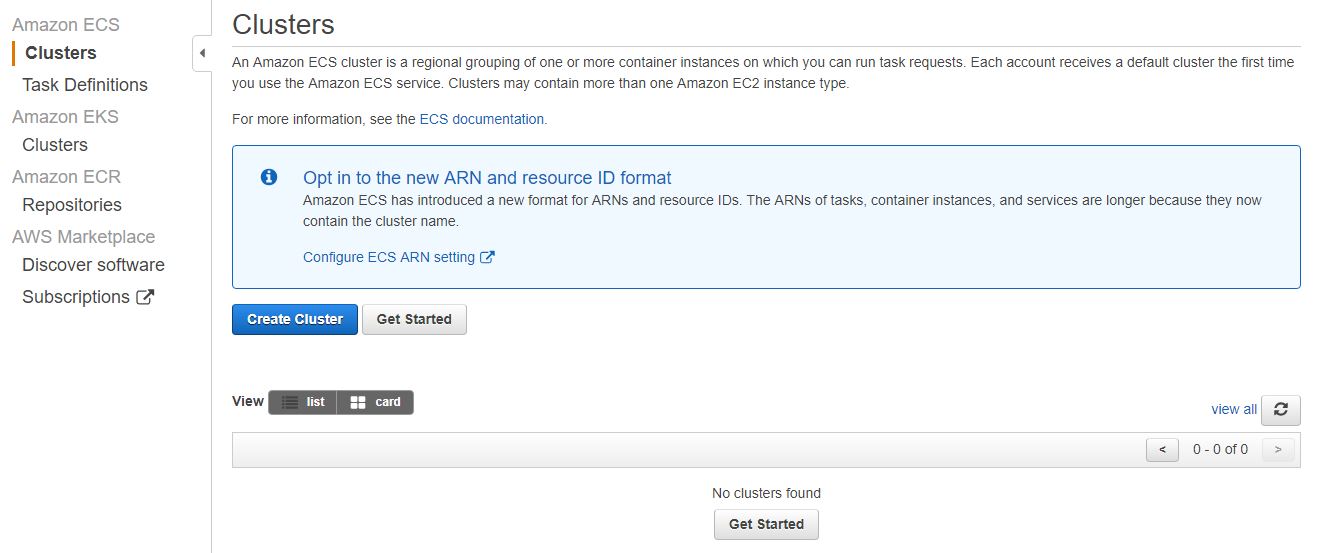
4. Create a cluster
Let’s create the infrastructure on which the containers will run. This is called a cluster, and includes a VPC, subnets, an EC2 instance on which the container will run, a security group and other necessary infrastructure.
In the ECS Clusters section, click on Create Cluster, and select EC2 Linux + Networking.
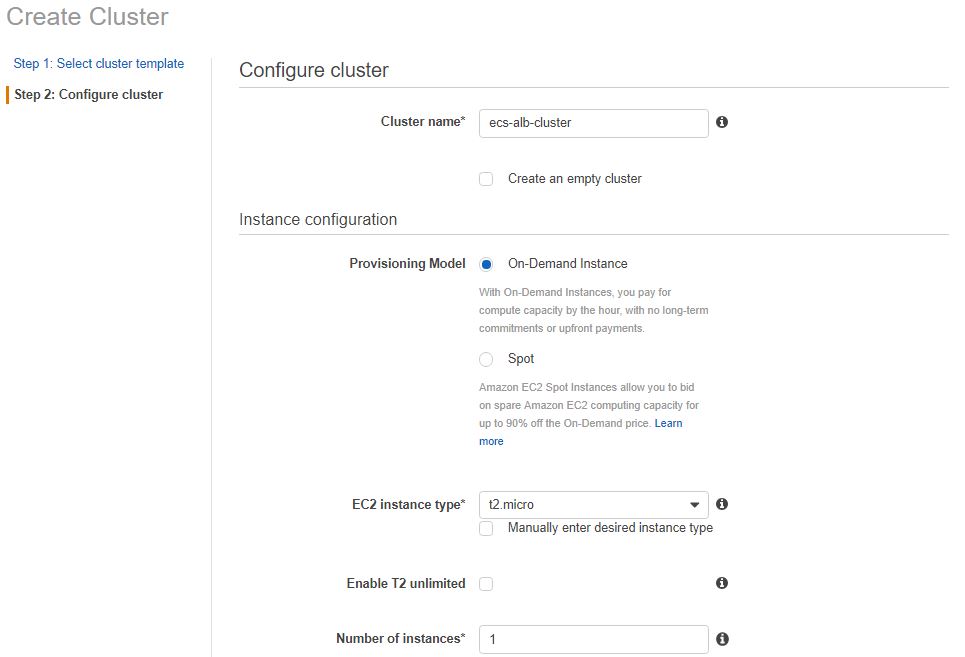
On the next page, add a name (ecs-alb-cluster), and select t2.micro for the EC2 Instance Type. t2.micro is available as a free tier option in AWS, so let’s use it!
The Number of Instances section specifies how many servers we want to run. We can leave it as 1 for now. If we choose to create more than one instance, they will be evenly distributed across the subnets in the VPC.
If you have a key pair in the region, you can select it in the Key pair section. If this option is chosen, we can SSH into the instance, and it’ll be possible for us to check the running containers with docker ps, or exec into the containers. Note that the security groups settings belonging to the instance must allow to the inbound traffic on port 22 if you want to log in to the instance using SSH.
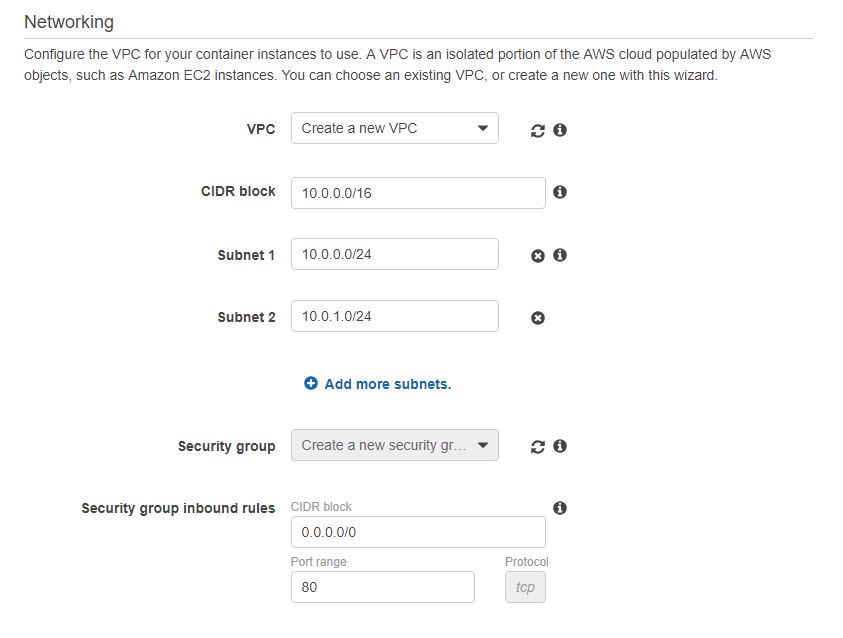
In the networking section, we can select if we want to use the default VPC, which is created automatically by AWS in each region when the account is established, or create a new VPC (default option).
Let’s leave the default option, and create a new VPC. This will create two subnets, and a new security group will also be created, just for the container instance.
The Container instance IAM role section defines the permission for the container agent, which connects the container instances to the cluster. It also provides permissions to register and update the container instance, and push logs to CloudWatch. If the ecsInstanceRole doesn’t exist (chances are it doesn’t if this is the first time you use ECS), AWS will create it.
Click Create, and the cluster should be up in a few minutes!
5. Create a service
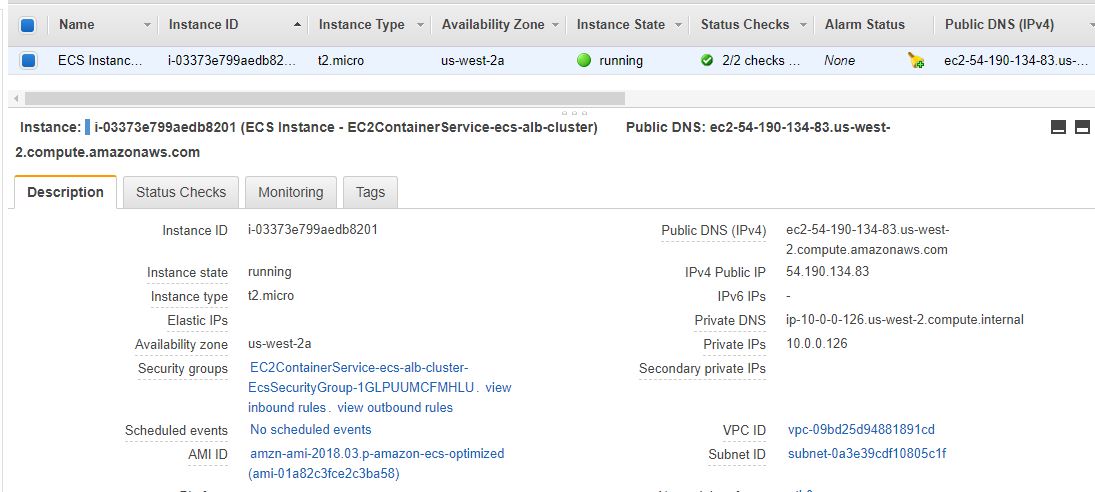
If you navigate to the EC2 section, you’ll see the instance running:
But, as yet, the container is not running on the instance.
In order for the container to get installed on the EC2 instance (ECS container instance), we’ll create a service. The service defines how we want to run the containers.
Select the newly created cluster, and in the Services section (first tab), click on Create.
Here we need to connect the Task Definition to the cluster by selecting both from the dropdown (if you don’t have more than one each, these fields will be populated). Select EC2 Launch type, and add a name to the service:
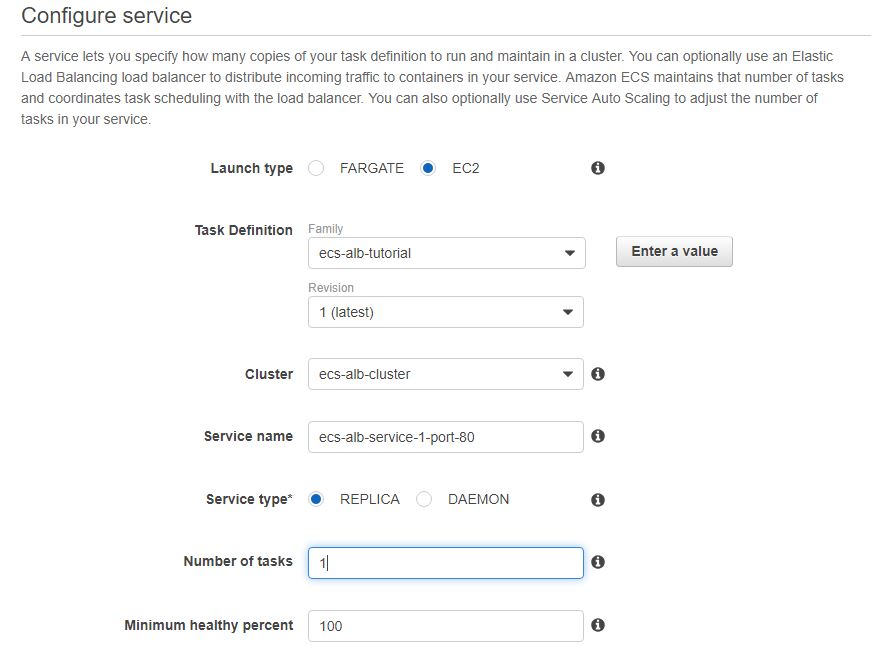
The Number of tasks section refers to the number of running containers. We can leave it as 1. If you enter 2, then two replicas of the same container will run in the cluster REPLICA mode. In DAEMON mode, the tasks will be evenly distributed in the subnets (we created only one underlying instance, so there wouldn’t be much of a distribution).
The next page contains the networking settings. We don’t need the load balancer for this tutorial, and untick the Enable service discovery integration checkbox to prevent AWS from creating a private namespace in Route 53 (this costs money, and it won’t get deleted automatically with the clean-up).
Click Next, leave the Auto Scaling Group as is (Don not adjust the service's desired count), click Next to go to the review page, and create the service.
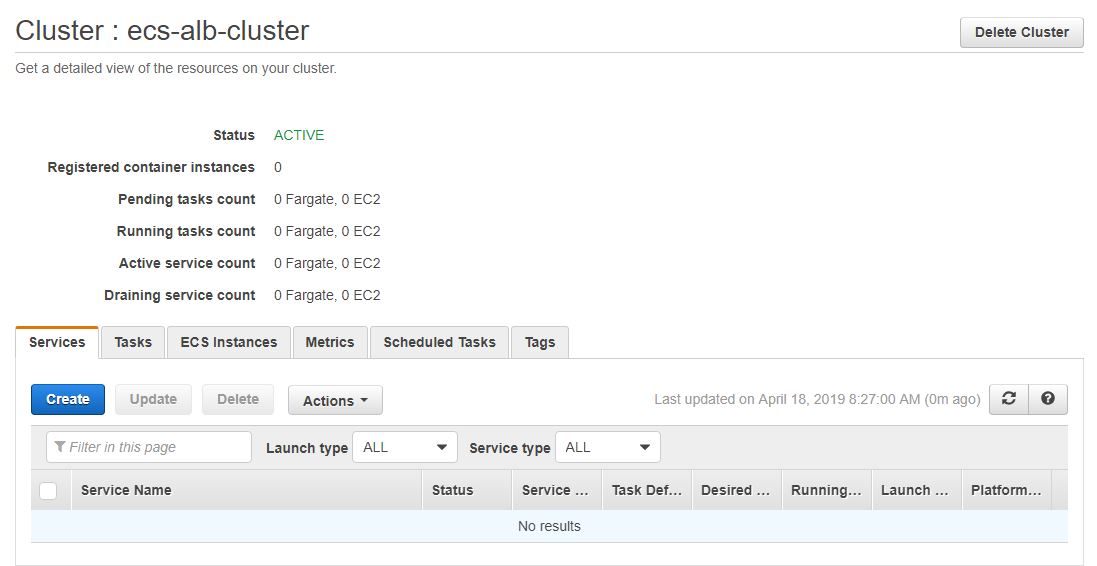
After a few minutes, the status of the service should change to RUNNING, which means that we can check if the app is working!
6. Check the app
Let’s go to the EC2 page, and find the instance’s public IP address (alternatively, we can get there by clicking on the task ID, then on the EC2 instance ID).
In the example above, the public IP address of the instance is 54.190.134.83. Enter this address in the browser address bar or curl 54.190.134.83 from the terminal. The response should be the following object:
{
  message: 'Home page'
}
Next, hit the /orders endpoint to get the delicious fruits:
curl 54.190.134.83/orders

# returns
# {"orders":["apple","banana","lemon"]}
It’s working!
7. Clean-up
If you followed along, then you have some resources running, which eventually cost money.
We don’t want this for practice, so let’s do a quick clean-up.
Go to Clusters in ECS, and hit the Delete Cluster button. This operation will take some time, and it should remove all resources you’ve created.
It might happen that the deletion fails. In this case, go to Services on the top menu, type VPC, find the new VPC you created, and manually delete it.
You can also deregister the Task Definition by clicking on it, and the Deregister option can be found under the Actions dropdown.
It’s a good idea to remove the image from ECR, because the storage costs money. To do this, go to ECR, select repository, and click on Delete.
8. Conclusion
This concludes the tutorial on how to deploy an application on AWS ECS.
Thanks for reading, and see you next time.